

Add users to your Office 365
- Launch an Incognito (Chrome) or InPrivate (Internet Explorer) browsing session
- Go to https://office.com
- Log in with your user name and password (that we created on our previous blog)
- Blog : SIGN UP FOR A DYNAMICS 365 CE ONLINE TRIAL
- Click “Admin” on the left Navigation. Below screen should display

- Set up basic information for User 1 and click “Next”

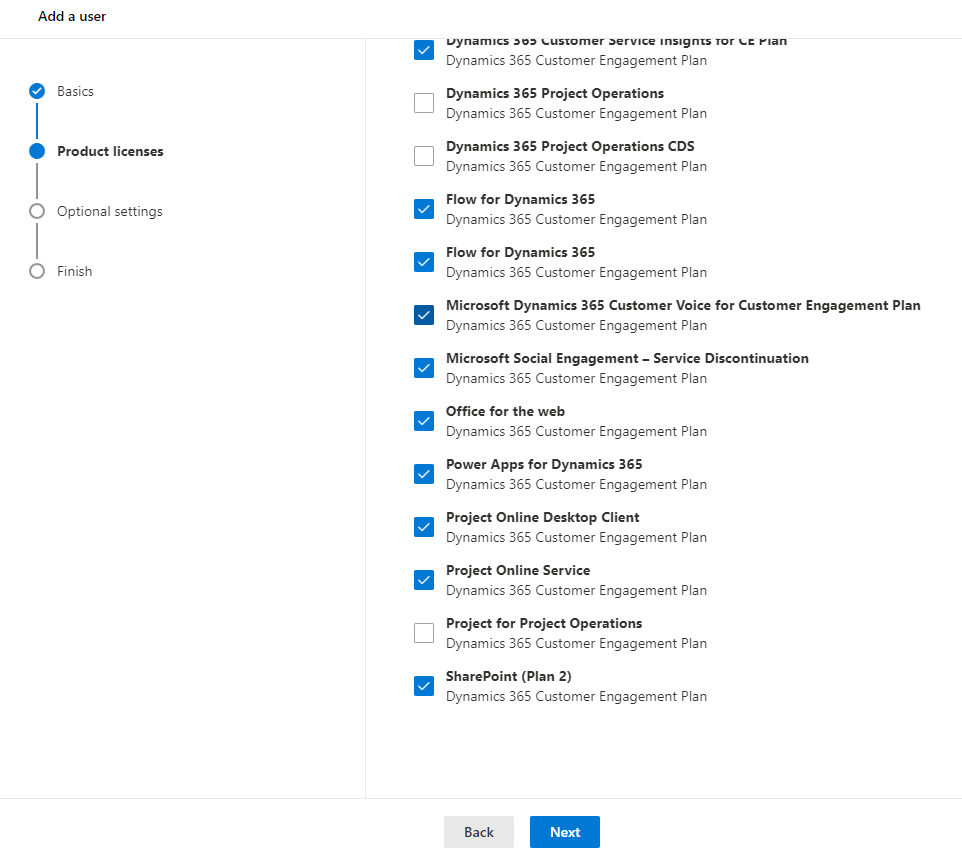
- Assign Product Licenses
- We have 25 user license for trail instance
- Select “Location”
- Click “Assign user a product license”
- And assign permission/license for each app

- Assign App Permissions/Licenses
 Optional Settings
- Assign Role as User or Admin
- Assign specific role if admin
- Enter Profile Information
- Review and Finish

- User should be added and we can save these settings as template
- Click “Close”
- Add multiple users using these same steps
-
Add users to the specific environment
- Go to https://admin.powerapps.com
- Select the environment
- Go to Settings

- Click “Users + Permission”
- Click “Users”
- Click “Add user”

- Search the user and click “Add”

- We should receive a message like

-
Assign Security role to the user in Dynamics 365
- Click “Go to Dynamics 365” or go to the specific environment using url
- Should be redirected to appropriate user
- Go to Settings > Security > User > Select User
- Click “Manage Roles”
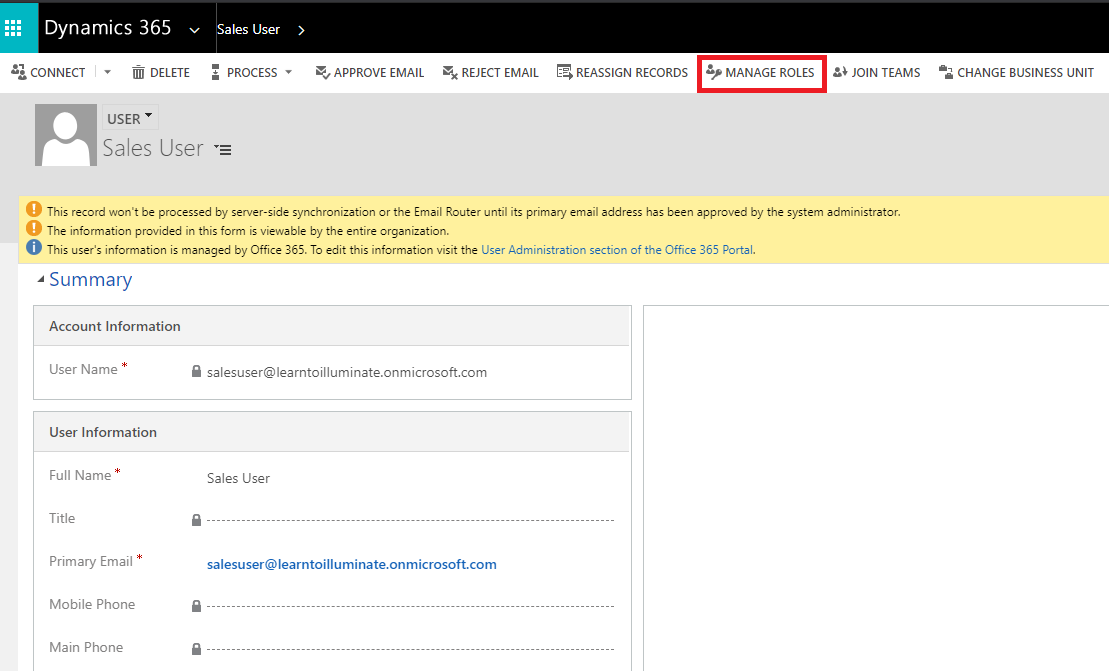
- Assign specific roles and “OK”

- New user should be able to use Dynamics 365 CE successfully.