In another blog, we discussed, how to train and publish the Form processing AI Model. This blog will discuss how to consume that AI model in a real scenario.
For our demo, we will use SharePoint as a source to send the input.
- The first step is for a user to upload the document to SharePoint
- The next step is Power automate flow will be triggered.
- The next step is to Power automate send the data or file content to AI Model.
- The Next AI model returns the result/output.
- Finally, Power automate update the result in SharePoint List, So that we can verify the data
Step by Step to consume AI model through Power Automate
- Create a Sharepoint list with the following fields. These are the objects/data elements that will be collected from the form.
- Create automated cloud flow
- Go to https://make.powerapps.com
- Select the appropriate environment
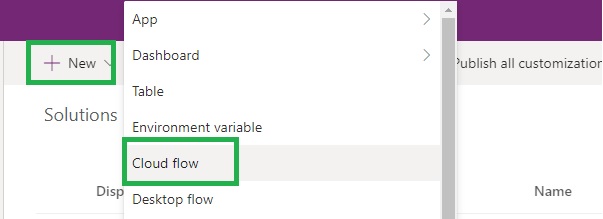
- Create New Solution (If not exist already)
- Click New to create Cloud Flow

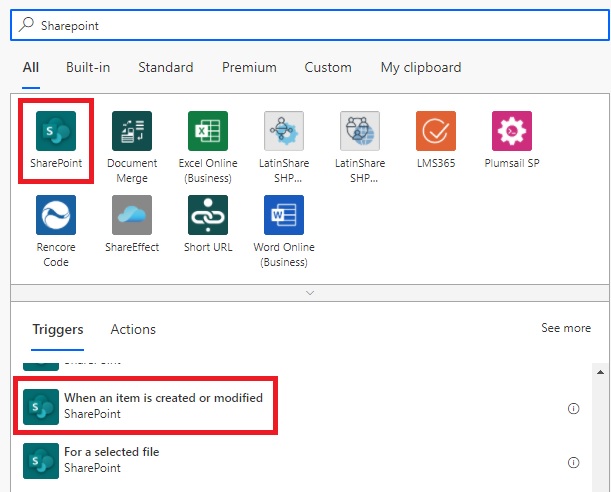
- Source: Sharepoint
- Trigger: When an item is created or modified

- Enter the name for the flow
- Select your Sharepoint site and list

- Add another action to get SharePoint Attachments
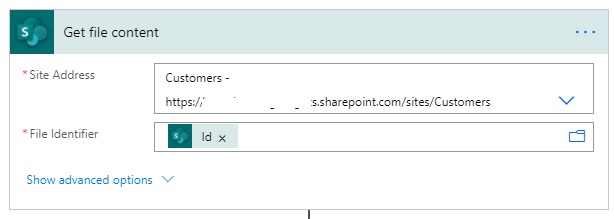
- Add action to SharePoint File Content
- Send the file content to AI Model
- Update SharePoint list item with the results
- Full view of the cloud flow

- Add a new list item in SharePoint
- Verify the result in the SharePoint list


